The Mammillaria genus is one of the largest groups of cacti, with more than 200 different species currently recognized.
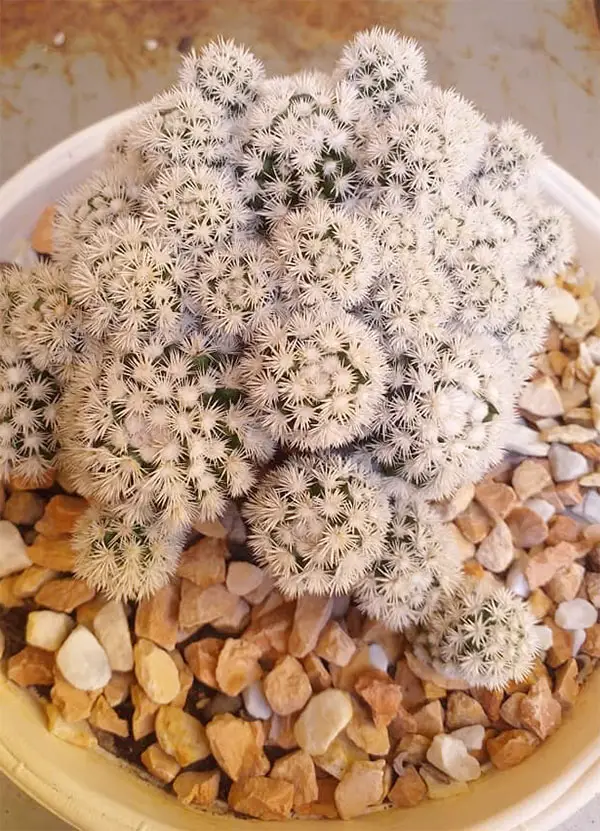
Easy to grow and commonly cultivated, most mammillaria cacti tend to be small and spherical with dense hairs or spines, which has given them the nickname “puff-ball cactus.”
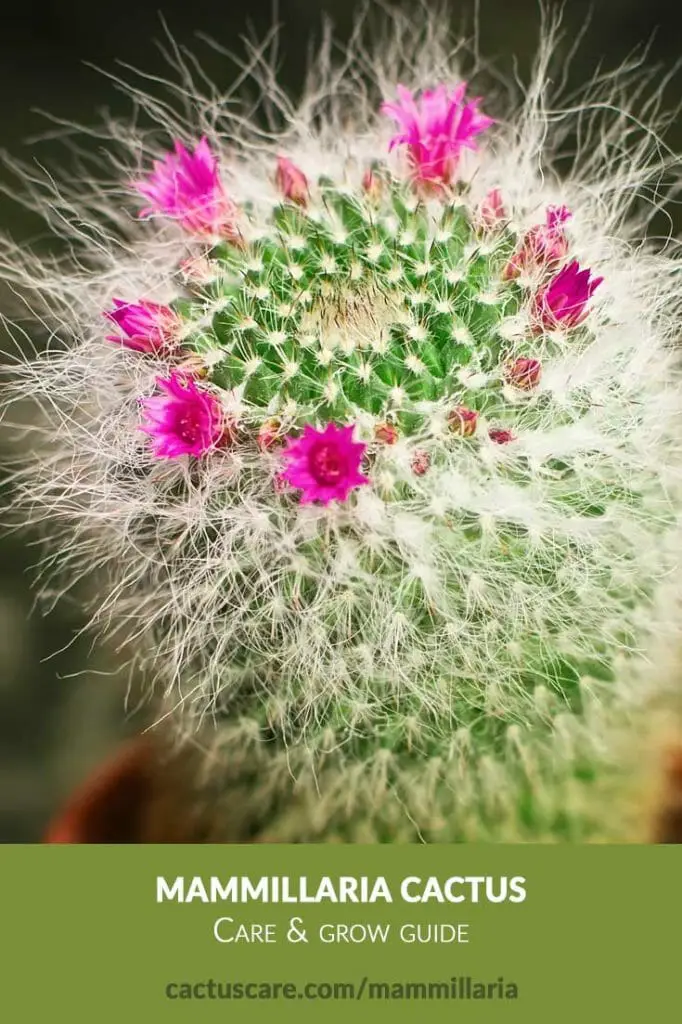
Mammillaria Cactus
- Bright, diffuse light; up to four hours of direct sunlight, depending on the variety
- Moderate for a cactus; water well when soil is nearly dry—do not allow to sit in water
- Typical cultivars range from 1" in diameter to 6"; some varieties can grow up to 30"
- Typically prefer a range of 50-85°F, though some varieties can withstand a freeze
- Commonly pink, but varies from species to species; appear in a "crown" around the top of the cactus
All cacti need well-drained soil, but it’s especially crucial for mammillaria species—cactus fans will often call them “mamms” for short—as they tend to be prone to root rot due to their shape and size.
For beginners, a commercial cactus mix is often your best bet.
Certainly, if you’re buying pre-mixed potting soil, make sure you’re choosing a cactus-friendly mix. Cacti do not require lots of extra nutrients, so look for a mix without built-in fertilizer.

I recommend this wonderful cacti soil mix by repotme. The quality is better than anything else I found on the market, and should help you grow a healthy cactus.
- High Quality Mix, Handcrafted in small batches
- Blended With Monterey Pine Bark from New Zealand, Red Volcanic Rock, Diatomite, and Premium Grade Pumice.
If you’re mixing up your own cactus blend, you’ll need both organic matter (plant-based material, which is what stores most of the main nutrients your cactus needs) and inorganic matter like sand, perlite, or pumice.
The most common organic matter used in cactus soil is peat moss, coconut coir, and sometimes shredded bark or bark chips.
Since Mammillaria are desert cacti, avoid the forest products and stick to peat and/or coconut coir.
Mix these in a 50/50 ratio with your choice of inorganic materials. Perlite and vermiculite are natural minerals that are great at aerating soils.
Sand drains well, but make sure to opt for coarse sand. Pumice, though a bit more expensive, is ideal for cactus mixes as it is lightweight and drains well, but it also holds just enough water to keep soils from growing compacted and hard.
Tips and Tricks
- Layer gravel or small stones at the bottom of your container to encourage quick draining. Place larger stones on the bottom and smaller stones toward the top of this layer to help keep soil from settling into the spaces between them.
- Avoid cactus mix potting soils that have a high concentration of peat moss. This tends to hold water too long, and, when it does dry out, is difficult to soak again, causing water to run off or pool. Coconut coir is a good alternative, and make sure your mixes contain vermiculite, perlite, or pumice.
- Some potting soils contain what’s called a “wetting agent,” which is designed to help water saturate into the soil when it’s first rehydrated. This is actually a good thing—you want your soil to take in water, rather than allowing it to run off the surface, so don’t worry that your soil contains this ingredient. It’s not the same as the ingredient found in many “moisture control” mixes that soaks up and holds water, which, of course, is not desirable for cacti.
- Don’t use standard potting mixes not designed for cacti!
Choosing the Right Pot

The right pot can make a big difference in how healthy and well-maintained your mammillaria cactus is.
For experienced gardeners or houseplant aficionados, choosing the right size pot for a cactus is somewhat counterintuitive.
Unlike leafy plants, which tend to quickly get “root-bound” and stressed in too small a container, cacti have the opposite problem.
Their root systems tend to be small and shallow, and too much additional soil can cause the pot to get soggy and encourage over watering.
So what’s the right type of pot for Mammillaria cactus plants?
Choose a pot that is relatively small, with large drainage holes.
Avoid any planters that come with an attached saucer; this encourages water build up and is tricky to drain. The pot should be 1-2″ larger in diameter than the cactus it will hold.
This may seem small, but remember that cactus plants are slow growing and spend a good part of the year dormant.
It will take time—at least a year, sometimes several!—before it’s ready to repot.
Tips & Tricks
- Glazed or unglazed? Either type of pot will work, but know that this will affect the watering needs of your cactus. Unglazed pots can wick away extra moisture, while glazed planters keep it in place. If choosing an unglazed planter, you might be able to get away with a slightly larger pot than if using a glazed container.
- A deep, narrow pot is better than a large, shallow one, especially if you have issues with poor drainage. Mammillaria roots are shallow, so a deep pot full of well-drained soil will quickly move excess moisture away from the roots toward the bottom of the pot. A shallow pot may have too much moisture pooling at the bottom and cause issues with rot.
- Use small drainage stones or gravel at the bottom to ensure potting mix does not block drainage holes.
- If your soil still isn’t draining as quickly as you’d like, elevate the pot above its saucer to increase airflow. It doesn’t take much—⅛ to ¼” will do. Make sure you don’t accidentally block drainage holes when you add lifts beneath the pot.
- You can plant different mammillaria species together in a single pot. Make sure there is enough space between them that they will not overshadow one another. You can buy a little extra room in your planter and still keep your plants healthy by choosing a sandier cactus mix and using areas of gravel or stones to prevent “dead” space where water and fungi can accumulate.
- It’s time to change pots when your mammillaria cactus grows unstable or overcrowded. Commonly, cactus plants become top-heavy, so if your cactus is threatening to upend its pot, or if it’s off-center due to uneven growth or die-off, it’s time to re-pot.
- Similarly, mammillaria reproduce by forming offsets—little mini cacti that cluster around the base of the main plant. These will start to spill over the edges of a small pot, so when they get too numerous, it’s time to scale up.
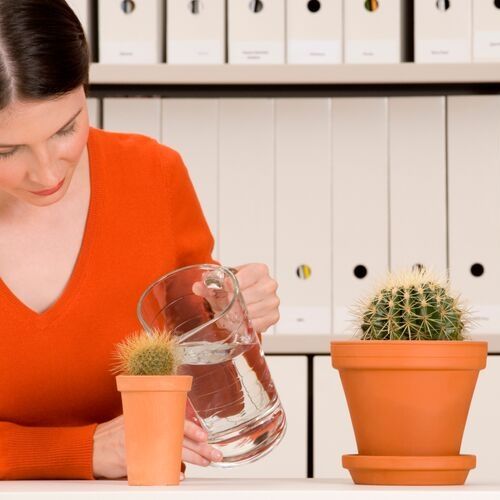
Watering Your Mammillaria
Mamms are great cacti for beginners because even though they’re desert dwellers in nature, they can handle a bit more water than many species, as long as their soil drains properly.
During the Growing Season
From spring through early fall, cacti are actively growing. They may be producing flowers or fruits, growing taller, or producing more offsets.
All of this is energy intensive, and requires water for the cactus to go about building all that additional plant material.
Allow the soil to grow quite dry— the surface of the pot should feel completely dry, but if you poke down about two inches into the pot, the soil should feel very slightly moist.
At that point, water thoroughly, enough so that water drains from the bottom of the pot.
Check on your mamm an hour or so after watering. The pots should no longer be dripping, and there should be no visible pooling water in the pot.
During the Dormant Season
Once fall comes and the days begin to grow shorter, cacti stop growing and go dormant.
It’s important to dial back your watering at this point because the cactus will not use as much, and your pot will be too wet for your cactus to remain healthy.
Instead, let the pot dry almost completely, then mist regularly, spritzing with a mister bottle until water runs down the cactus.
This will be plenty of water to tide your cactus over until growth begins again in the spring.
Light Requirements
Since almost all mammillaria species like mammillaria elongata, spinosissima, hahniana, and more, are native to desert areas in northern Mexico and the southwestern United States, they tend to do better with more direct sunlight than many other cactus varieties.
This is another one of the traits that make them so well suited for beginning cactus growers.
Indoors
Mamms are some of the most commonly grown indoor cactus varieties, and they take to it very well. During the growing season, make sure they get plenty of light.
Bright, indirect light will do fine, but up to four hours of direct sunlight will also be okay for most mammillaria varieties.
If you don’t get consistent natural light in your home, you may want to provide some extra in the form of a small LED plant light.

We recommend this affordable indoor grow light that will work well for any cacti, if youdon’t have a lot of sun exposure in your indoor space.
- Full Sunlight Spectrum
- Integrated timer so you can set it up to make your cacti flower
- Adjustable brightness
Outdoors
If you live in a warm climate, you can plant your cactus outdoors, or move it outdoors once the weather grows mild.
Give your potted plant time to acclimate to the change in light and temperature by keeping it out of direct sunlight at first, gradually increasing its exposure.
If your mamms are planted outdoors, look for a spot that gets direct sunlight early or late in the day, rather than at noon, when light and heat are most intense.
Conversely, remember that mammillaria cacti tend to be low-growing, so tall plants can easily overshade them.
Factor in these companion plantings when designing your landscapes to avoid spindly-looking, light deficient cacti.
How much light is too much?
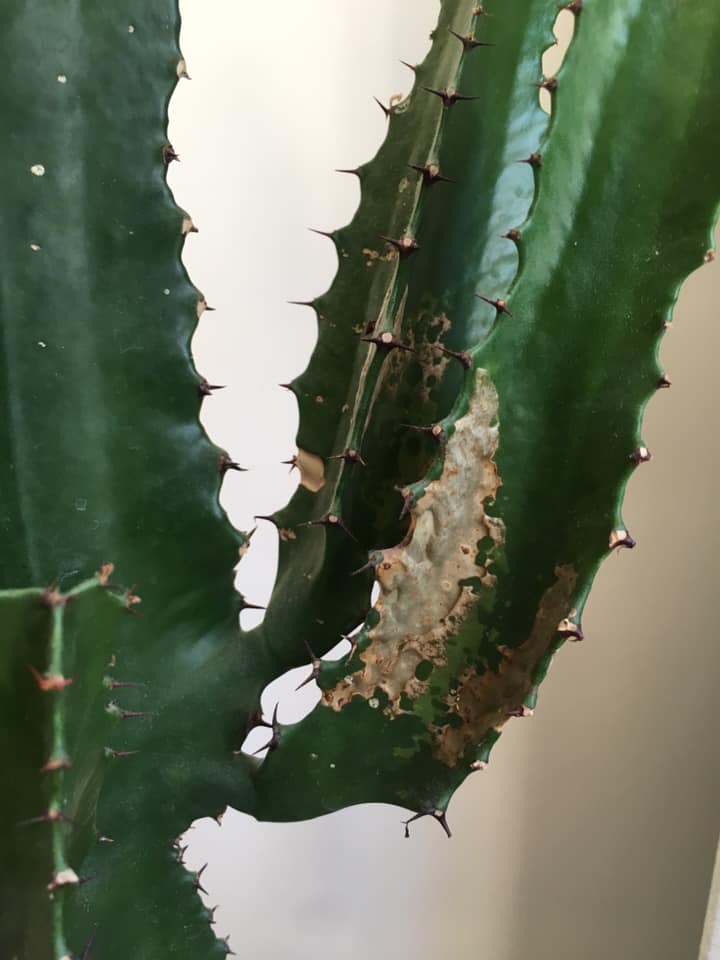
Believe it or not, cacti can get sunburned. It looks like bleaching or rough grey or brown spots appearing on the surface of the cactus.
If you spot this kind of damage, move the plant to a spot that gets diffuse instead of direct light.
Sunburn probably won’t be fatal to your plant if you catch it quickly, but sunburned areas tend to grow unevenly, if at all, so your mamm might be a bit wonky looking as it continues to grow.
Left unchecked, sunburn can destroy your plant, so never just assume your cactus will be fine if left to bake in the sun.
What about too little light?
During their dormant phase, mamms can get by with fairly little light, but while they’re growing, they’ll need more.
Specific varieties have different needs, so check the tolerances of your particular cactus, but in general, four hours of bright, indirect sunlight will do.
Less than that, and your plant may start to etiolate—grow pale and spindly. It can be tricky to spot in mamms because of their spherical shape, but it can be particularly noticeable in offsets, which may be unusually shaped and pale green or yellow in color.
Sudden, rapid growth is also a sign of too little light. Your cactus is trying to get tall enough to find a light source, but if it doesn’t get more quickly, it will simply burn through its energy reserves, making it vulnerable to damage and disease.
Adding supplemental light is a good idea for indoor cacti that don’t have access to natural light, but remember that not all lights are equal.
Simply turning on a desk lamp won’t provide the proper wavelengths that cacti need for their metabolic processes.
Opt for full spectrum lights (click to see our recommendation on Amazon), or specially designed grow lights containing red and blue LEDs, which use less energy, but provide targeted light in the wavelengths plants require most.
Remember to put your cactus to sleep! Cacti need their dormant period in winter to better survive the cooler temperatures and lower light levels.
If you continue to water and feed your cactus at the same rate as you do the rest of the year, your plant may not go dormant, and will exhibit signs of etiolation as it tries to continue growing all winter long.
Avoid the temptation to force year-round growth and dial back your watering in the fall to encourage dormancy.
Fertilizer Requirements
Cacti, especially desert varieties like mammillarias, have minimal needs when it comes to nutrients in their soils, so a little fertilizer goes a long way.
Because common fertilizers like compost tend to be heavy in organic matter, which holds onto a lot of water, cacti do better with a water-soluble fertilizer.
There are plenty of organic options available, if you prefer.
You can look for a blend that has a slightly higher phosphorus content and lower nitrogen levels.
Nitrogen promotes plant growth, and slow-growing cacti don’t need much help in that department. Phosphorus, on the other hand, helps promote vibrant blooms and overall health.

We recommend this fertilizer, designed specifically for cacti. Make sure to follow the instructions and not use too much fertilizer.
- Provides calcium and other nutrients to your cactus
- Mix 1 teaspoon per gallon of water and apply as a soil drench to the base of a plant
- Feed plants and flowers every 2 weeks during the growing season
- NPK 1-7-6 fertilizer Analysis
Encouraging Blooms

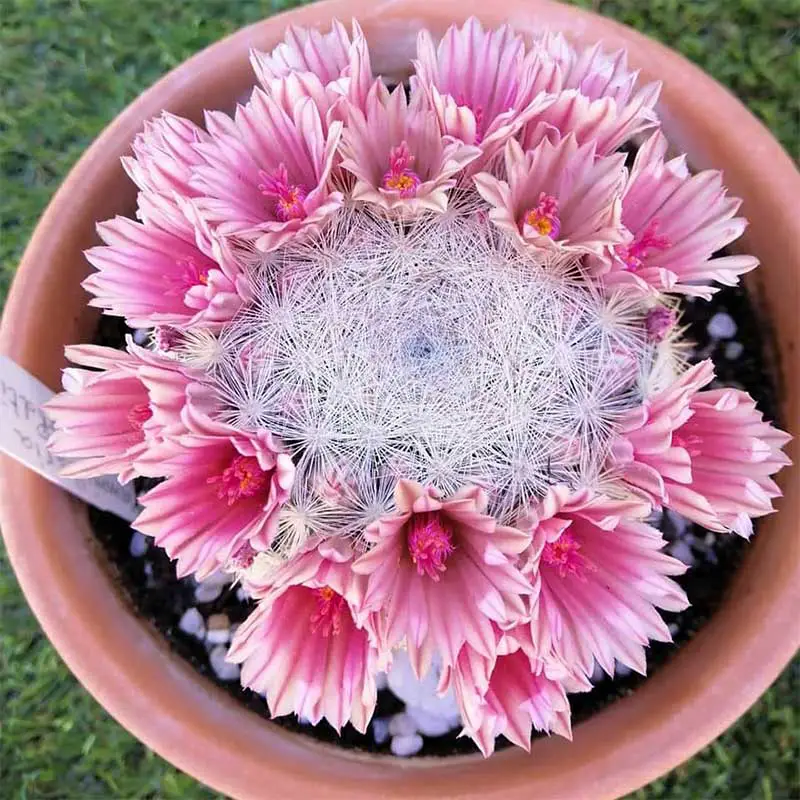
Cactus blooms are beautiful, and mammillaria blossoms are especially stunning. Mammillaria cacti grow in a sort of slow spiral, getting taller and rounder from the point at the center from which all their spines seem to radiate in perfectly geometric patterns.
Blooms appear on the previous year’s growth, and so form a halo around the top of the plant.
Given the small size of most mammillaria varieties, the blooms often appear oversized.
They’re most commonly pink, but some varieties bloom white, yellow, red, and even orange.
Flowering for wild cactus plants is a carefully choreographed dance.
The blooms are short-lived, so cacti need to know they’re going to attract the right pollinators.
Lighting is the biggest cue for plants to know when the time is right to bloom.
Make sure to give your mamms a proper dormant period, including mimicking the lower light levels of winter. Then, when it’s spring (or when you want to trick your cactus into thinking it’s spring) increase light levels slowly and steadily.
If you’re using red and blue grow lights, additional red light may help encourage blooming.
Blooming Tips & Tricks
It might seem counterintuitive, but plants tend to bloom better when they’re just a bit stressed. This is another reason to keep your cactus in a small pot—the slight stress from being just a little root-bound will encourage the plant to bloom.
Remember that as spring arrives and the light your cactus receives begins to increase, the temperature should also rise.
This is especially important for indoor cacti and those that receive most or all of their light from artificial sources.
A cactus on your desk in an air-conditioned office may not respond to its growing season even if the light is appropriate because the ambient temperature is too low.
Move it to a window sill that gets direct sunlight, or, in a pinch, set the pot on a low-temperature germinating mat to warm it slightly.
Don’t overfeed your cactus.
Fertilizing might seem like a good way to encourage blooming, but if given the choice, cacti in a nutrient-rich environment tend to focus on getting bigger, not on producing flowers.
Be patient.
Cacti don’t necessarily bloom every year, though it’s more likely your mammillarias will bloom consistently as they mature.
Give your cactus a good year’s growth and winter dormancy, then watch closely the following spring.
Remember, blooms form on the tubercles that grew the previous year, so even if you don’t get blossoms during one growing season, you’re still setting yourself up for beautiful blooms the following year.
After your cactus blooms, if the blossoms were pollinated, your cactus may set fruits.
For many mammillaria varieties, these are edible, if quite tiny.
A special treat for the patient cactus grower! If your cactus doesn’t have access to natural pollinators, you can help it along by using a cotton swab to gently transfer pollen from one blossom to another.
How to Repot a Mammillaria Cactus
There are two main types of planting when it comes to mammillaria.
Either you’re planting a grown cactus—when repotting, moving, or creating a new planter or garden space—or you’re propagating more cacti from offsets.
The techniques for each are slightly different.
When it’s time to repot, first start by preparing your cactus. Repotting is best done early in spring, when your cactus is coming out of its dormant phase and starting to grow again.
Wait until your cactus is just about ready to be watered—mostly dry soil is easier to remove from the pot, and will cause less damage to your cactus’ roots.
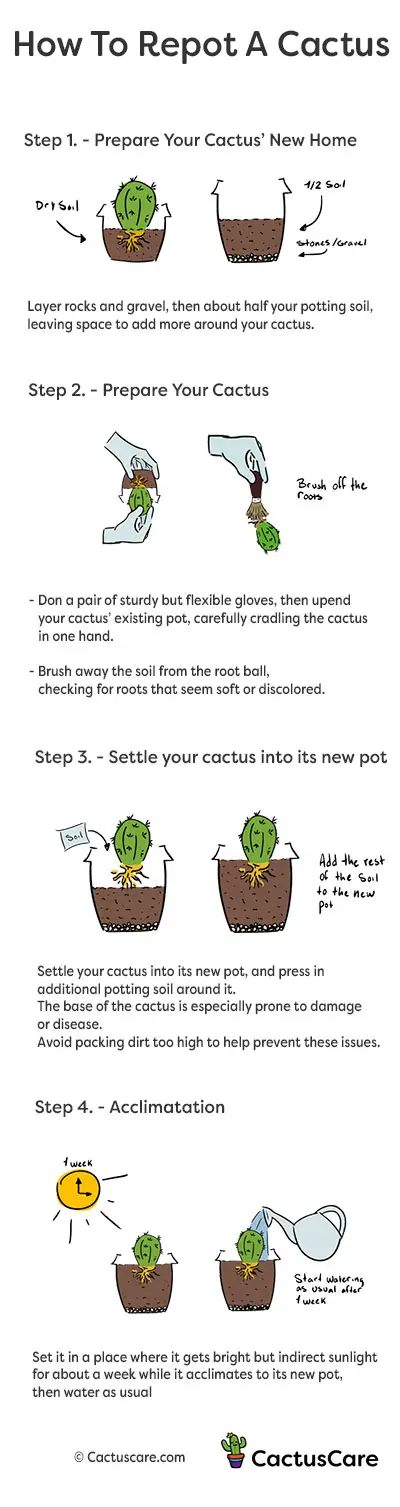
Next, prepare your cactus’ new home.
Layer rocks and gravel, then about half your potting soil, leaving space to add more around your cactus.
Don a pair of sturdy but flexible gloves, then upend your cactus’ existing pot, carefully cradling the cactus in one hand.
Try not to pull on the cactus, as this can damage the roots. If the soil doesn’t want to come out of the pot, slide a planting knife around the interior of the pot—just like trying to get a stubborn cake out of a pan.
Once the soil is loosened, try upending the pot again. The cactus should slide right out, along with its potting soil.
Brush away the soil from the root ball, checking for roots that seem soft or discolored. If you spot anything brown or mushy, cut it away and treat the root ball with an organic fungicide to prevent more root rot.
Settle your cactus into its new pot, and press in additional potting soil around it. Because mamms grow close to the ground, the base of the cactus is especially prone to damage or disease.
Avoid packing dirt too high to help prevent these issues.
Don’t water in your cactus right away.
Set it in a place where it gets bright but indirect sunlight for about a week while it acclimates to its new pot, then water as usual, and, if you prefer, move it to a place where it can get up to four hours of direct sun.
Propagating from Offsets
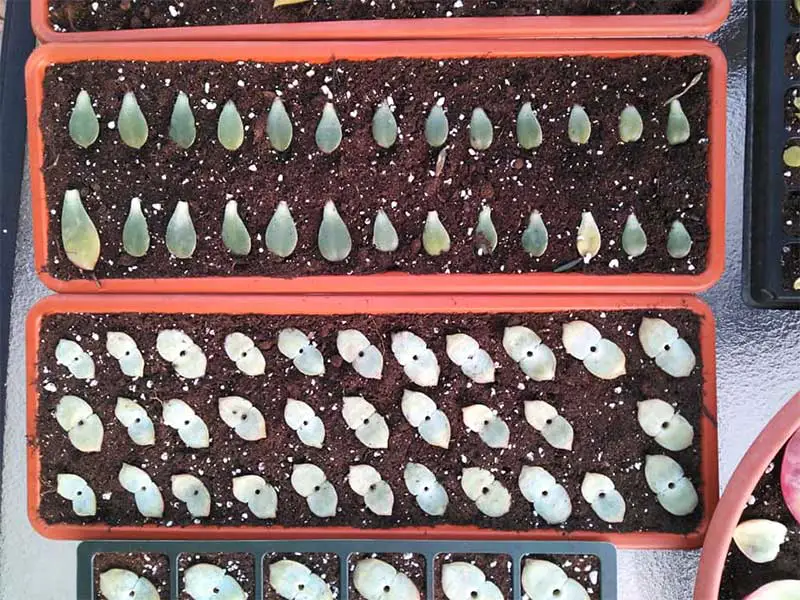
When you’re repotting a thriving mamm, it’s a good opportunity to cut away the offsets and start some additional plants.
Clean your potting knife with alcohol or a diluted bleach solution to make sure you aren’t introducing any pathogens, then cut the offsets away from the parent plant using an angled slice.
This will help prevent water from pooling on the cut and introducing pathogens. Don’t cover these cuts with soil.
They need to remain exposed to air to dry and form a callus—a whitish, slightly shriveled scar that protects the plant from water loss and disease.
The offsets will also need to be allowed to callus before they can be potted. Let them dry in a warm location where they get indirect sunlight until those scars have fully covered the cut area.
If you’re concerned about disease, you can use a sulfur-based fungicide powder to dust the cuts on fresh offsets, but this isn’t strictly necessary.
Plant the offsets in small pots, using enough soil around the cactus to keep it in place. You might need a bit more coverage than for a growing mamm, since there’s no root ball to anchor it.
It typically takes at least four weeks for offsets to root; some varieties can take months. Be patient.
Keep the offsets in bright but indirect light, and keep the soil consistently but only slightly moist.
This might mean more frequent but smaller waterings than for an actively growing cactus.
There may not be any roots to rot just yet, but you still don’t want the plant to be sitting in water.
You want just enough moisture to give those new little roots something to reach for.
You’ll be able to tell when your cactus has taken root because it will take begin to take in water, plumping up and growing greener as its metabolism kicks into gear. You’ll soon begin to see new growth as well.
Try to plant your offsets in spring, just ahead of their growing season, to encourage vigorous growth for as long as possible before the cactus goes dormant.
If you have to plant during the winter, try to mimic those spring- or summer-like conditions using artificial lights and a heated germination mat to provide a little extra warmth in cold rooms.
Comprehensive!
I cannot seem to find an email site to ask a question about mammillaria going dormant. I live in southern Colorado and autumn starts September 22,2022. Can I put some water-soluble succulent food on my Tussie(her name) prior to going dormant. She has become a little stressed from my stupid repotting to many times. Being a novice with succulents I panicked about the potting soil and tried a few types before I found one a nursery recommended. I put some peat moss with it as recommended. So, I think she suffered repotting stress from me stupidly repotting her 3 times in a 2-month period. I was also told to give her some water-soluble succulent food to help with her stress. I am writing like a fool I know, however I am worried she will not be okay when she does go dormant. I hope I have connected with an email site that can help me. thanks, Jan Connor